The Art of Installing Wood Plank Ceilings: A Comprehensive Guide

Transforming the ambience of a room can be effortlessly achieved with wood plank ceilings. These ceilings add a rustic charm and elegance that is hard to match with other materials. Before diving into this project, it’s beneficial to consult a detailed ceiling wood planks installation guide, as it can provide unparalleled insights into every step of the process, ensuring a smooth and successful installation.
Choosing the Right Materials
Selecting the appropriate wood planks is crucial for long-term satisfaction with your project. Consider factors such as wood type, colour, and plank width. Commonly used woods include pine, oak, and cedar due to their durability and aesthetic appeal. Depending on the desired finish, you might choose unfinished planks to stain and seal yourself or opt for pre-finished versions for convenience.
Preparing Your Ceiling
Preparation is key in any installation project. Ensure your ceiling is clean, dry, and level. If you have an existing ceiling, remove fixtures or mouldings that could obstruct the installation. For homes with plaster or textured ceilings, check that the existing surface is stable and suitable for the planned installation method. If the ceiling contains older popcorn texture, have it tested for asbestos before sanding, scraping, or disturbing it. Remember to address any electrical or lighting accommodations before laying the planks.
Measuring and Planning
Accurate measurements ensure a flawless installation. Measure the length and width of your ceiling to calculate the surface area and determine how many planks you’ll need. It’s advised to buy an extra 10% to account for mistakes or wastage. Consider the direction you want the planks to run; along the longest wall is traditional, but diagonal or herringbone layouts offer creative alternatives.
Installing a Support System
Before you start installing the planks, a support system such as furring strips or battens is essential. These should generally be installed perpendicular to the direction of the planks and securely fastened to the ceiling joists. The spacing should follow the plank manufacturer’s recommendations to provide adequate support and help prevent sagging.
Acclimating the Wood
Wood planks should acclimate to the room’s environment to prevent expansion or contraction after installation. Store the wood in the installation room for at least 48 to 72 hours. This period allows the wood to adjust to the room’s temperature and humidity, mitigating potential movement post-installation.
Tools and Safety Gear
Ensure a smooth installation by having the right tools on hand: a saw for cutting planks to size, a measuring tape, a drill with screws, and a nail gun for secure fastening. Safety equipment, such as goggles, gloves, and a dust mask, is critical to protect yourself during cutting and installation.
Installing the Planks
Start from one corner of the room, preferably along a side wall. Secure each plank to the furring strips using the fasteners and installation method recommended by the manufacturer. Mechanical fasteners are commonly used for ceiling installations, while adhesive should only be used when approved for the specific product and ceiling application. Use a hammer and nails or a nail gun for convenience. Maintain consistent spacing between the planks according to the manufacturer’s installation instructions. Allow for the necessary expansion and contraction gaps, particularly around the ceiling perimeter, to accommodate natural wood movement.
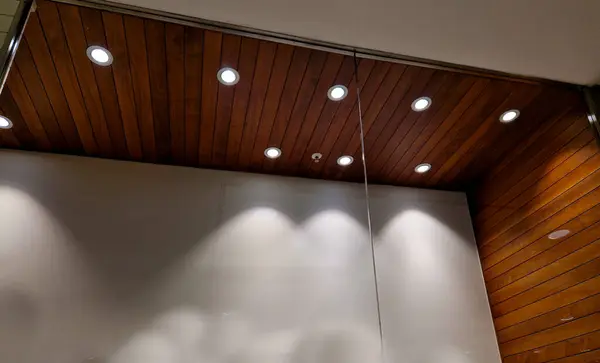
When reaching the edges of the ceiling, you will likely need to cut the planks to size. Measure the required length precisely and cut with a saw, ensuring a snug fit to avoid gaps. If your ceiling includes fixtures such as lights or vents, measure and cut appropriate holes to accommodate them.
Sealing and Finishing
If you opted for unfinished wood, now is the time to add a protective coat. Sand the planks lightly to prepare the surface, then apply stain or sealant with a brush or cloth. This additional layer not only enhances the appearance but also protects the wood from moisture and wear. Ensure adequate ventilation while the finish dries.
Maintaining Your Wood Plank Ceiling
To maintain the beauty and longevity of your wood plank ceiling, periodic cleaning is recommended. Dust and clean with a soft cloth or mop; avoid excessive water or abrasive materials. Applying a fresh coat of finish every few years can help preserve its appearance and durability.
See also: Closed Cup Flash Point Tester – Understanding Safe and Accurate Flammability Testing
Troubleshooting Common Issues
Even with meticulous planning, issues can arise during installation. Warping can often occur if the planks weren’t properly acclimated or if there is too much moisture in the room. Adjusting humidity levels and reinforcing affected planks can resolve this. Likewise, if gaps appear as the wood shrinks, adding trim or moulding can provide a seamless finish.
For a detailed breakdown of every step, consult an expert source or professional installer. Their insights, particularly for complex layouts or unique challenges, can be invaluable in refining your approach. Seeking assistance at any stage can ensure a successful and lasting installation.
Embedding these essential steps into your planning allows not just for an installation of high quality but also guarantees a pleasing visual result. With these insights on hand, the dream of a wooden plank ceiling becomes a tangible and achievable home improvement reality.