Easy Plaster Wall Art Techniques Every Beginner Should Try
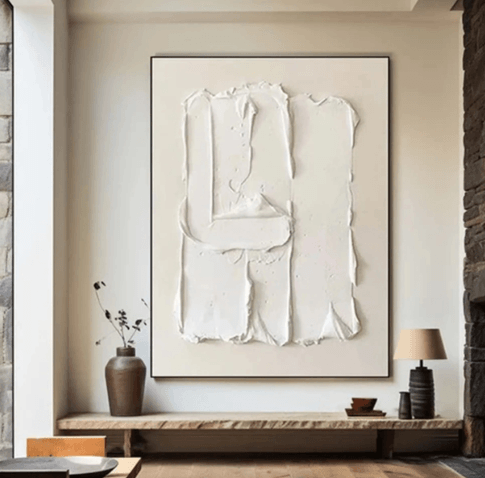
You don’t need an art degree to make something that looks genuinely good on your wall. Plaster art has this reputation for being fancy and complicated, like something only a professional artisan could pull off. Honestly? It’s one of the more forgiving mediums out there. Mistakes just become texture. Uneven spots look intentional. It’s basically the most beginner-friendly “advanced-looking” craft you can try.
Why Plaster Art Is Perfect for Beginners
Painting on canvas can be stressful because every brushstroke shows, and there’s not much room to hide a wobbly line. Plaster is different. You’re working with a thick, textured medium, so small imperfections just blend into the overall look. A lot of the most popular plaster pieces you’ll see online actually rely on unevenness to look interesting.
It’s also fast to learn. You’re not mastering brush control or color theory right away — you’re mostly learning how to spread, layer, and texture material. That’s a much shorter learning curve than traditional painting.
What You’ll Need to Get Started
Before you start Googling fancy tools, know that the basic list is short:
- A base panel (wood board, canvas board, or even thick cardboard for practice)
- Joint compound or plaster of Paris (joint compound is easier to work with for beginners)
- A few putty knives or spatulas in different sizes
- Sandpaper for smoothing rough spots after drying
- Acrylic paint or pigment for color, if you want it
- A sealant or wax finish to protect the final piece
That’s genuinely most of it. You can spend more on specialty tools later if you get into it, but none of that is necessary for your first attempt.
Easy Techniques to Try First
The Basic Spread and Swipe
This is the technique almost everyone starts with. Apply plaster to your panel with a putty knife, then use broad, sweeping motions to spread it evenly. Don’t aim for perfectly flat — leave some texture and slight ridges. Once it’s dry, those little imperfections catch the light and give the piece depth.
Layered Texture
Instead of one flat coat, apply plaster in two or three thin layers, letting each one dry a bit before adding the next. This creates natural depth and subtle shadowing once it’s fully dry. It’s a great way to make a piece look more complex than it actually was to make.
The Comb Technique
Once your plaster is applied but still wet, drag a notched trowel, a fork, or even a comb through it in one direction. This creates ridged lines that catch light beautifully, especially under warm lighting. It’s one of the easiest ways to make a piece look intentional and textured rather than just messy.
Circular or Organic Swirls
Using a small putty knife, work in loose, circular motions instead of straight lines. This gives a more organic, natural look — great if you’re going for something softer and less geometric. It pairs really well with muted, earthy color palettes.
If you want a full walkthrough with more detail on tools, drying times, and troubleshooting common issues, there’s a solid guide on DIY plaster painting that breaks the whole process down step by step for people trying this for the first time.
Adding Color Without Overdoing It
Plaster art doesn’t need to stay white or gray. A few ways to bring in color:
- Mix pigment directly into the plaster before applying it, so the color runs all the way through instead of sitting on the surface
- Paint on top after it’s dry, which gives you more control but can look slightly less integrated
- Use a dry brush technique with a small amount of paint over the raised texture, so the color catches only on the high points and leaves the recessed areas lighter
Muted, earthy tones tend to work best with this medium. Bright, saturated colors can look a little strange against a rough, matte texture — it clashes with the whole vibe plaster art is usually going for.
Common Beginner Mistakes
Mixing plaster too thin. If it’s too watery, it won’t hold texture and will just look like a smudge once dry. You want something closer to the consistency of thick peanut butter.
Rushing the drying time. Plaster needs real time to cure, and working on top of a layer too soon can cause cracking or lifting later. Patience matters more here than in almost any other craft.
Skipping the sealant. Unsealed plaster can be fragile and prone to dust or minor damage over time. A simple sealant or wax finish protects your work without changing the look much at all.
Overworking the surface. It’s tempting to keep smoothing and adjusting, but plaster starts to lose its texture and character if you fuss with it too long. Sometimes the first pass is the best one.
Where Plaster Art Fits in a Room
Plaster pieces tend to look best in spaces with natural materials nearby — wood furniture, linen textiles, stone accents. The rough, matte texture plays well against those materials in a way it doesn’t against glossy or sleek modern decor.
It’s also a natural fit if you’re already drawn to Wabi Sabi style spaces, since imperfection and texture are basically the whole point of both. If you like working with your hands and want to explore that philosophy further, it’s worth looking into Wabi Sabi ceramics too — a lot of the same instincts around imperfection and organic shape carry over from plaster into clay work.
See also: Business Acquisition Financing Canada: Funding a Successful Business Purchase
FAQ
Do I need special tools to start plaster wall art?
Not really. A basic putty knife, some joint compound, and a board to work on will get you through your first few pieces. Specialty trowels and tools are nice to have later, but they’re not necessary for a beginner project.
How long does plaster wall art take to dry?
It depends on thickness, but most pieces need at least 24 to 48 hours to dry fully, and thicker layers can take longer. Rushing this step is one of the most common reasons beginner pieces crack or peel.
Can I fix mistakes once the plaster has dried?
Yes, to an extent. Light sanding can smooth out awkward spots, and you can always apply another thin layer on top to adjust the texture. It’s much more forgiving than painting, where mistakes are harder to cover up.
The best part about plaster art is that it doesn’t punish beginners the way a lot of other mediums do. Grab some basic supplies, expect a few rough spots, and you’ll probably end up with something you actually want to hang up.