How do Underlayment Upgrades Improve Long-Term Leak Resistance?
Roof leaks rarely start as dramatic openings that you can spot from the ground. More often, they begin as small pathways created by wind-driven rain, ice, fastener movement, or tiny gaps around roof details. Underlayment sits beneath the primary roofing material and serves as a secondary water-shedding layer when shingles, tiles, or metal panels are exposed to weather. Because it is mostly hidden, many homeowners only think about it during a replacement, yet underlayment decisions influence how the roof handles decades of temperature swings and seasonal storms. Upgrading the underlayment can improve leak resistance by enhancing water control, sealing around nails, and protecting vulnerable transitions. A smart upgrade is not about adding cost without purpose, but about choosing materials and installation methods that match the roof design and the climate risks you face.
What to upgrade and why
- Know what underlayment is protecting against
To choose meaningful upgrades, it helps to understand how water gets past the outer roofing layer. Wind can push rain uphill under shingle edges, especially near ridges, hips, and rake edges. Ice dams can back up water under shingles at the eaves, sending moisture toward nail penetrations and seams. Even in mild climates, condensation and small intrusion events can happen around flashing joints, plumbing vents, skylights, and valleys. Underlayment serves as a continuous barrier that sheds water down the roof deck and toward the eaves, giving the primary roof covering time to recover when it is stressed. Traditional felt underlayment can work, but it is more vulnerable to tearing, wrinkling, and moisture absorption, which reduces performance over time. Many upgrades focus on staying flatter, resisting tearing during installation, and keeping water from traveling through overlaps. Some underlayments also provide better slip resistance for installers, which can reduce installation mistakes that later become leak points. When you treat underlayment as a system component rather than a thin layer of paper, you start looking for upgrades that address the real pathways water uses.
- Synthetic underlayment upgrades and seam control
Synthetic underlayments have become common because they are lighter, stronger, and more stable than many older felt products. A key leak-resistance upgrade is choosing a synthetic sheet with high tear resistance and good dimensional stability so it stays flat and keeps overlaps intact under heat and wind. Wrinkles and slack areas can trap water, redirect flow, and create channels that feed into fastener penetrations. Some synthetics also include printed fastening patterns that help crews maintain proper nail spacing, reducing random fastener placement that can weaken the water-shedding path. Another upgrade is to improve seam control by using approved seam tape at overlaps in vulnerable sections, such as lower roof slopes, complex roof geometry, and areas exposed to wind-driven rain. Sealing overlaps reduces the chance of capillary action pulling water sideways under the sheet. If you are evaluating contractors and materials, ask for more about Three Tree Roofing and how they approach seam taping, overlap layout, and underlayment selection for different roof shapes. The long-term gain comes from consistent water routing and fewer weak points where small intrusion events can sneak in over the years.
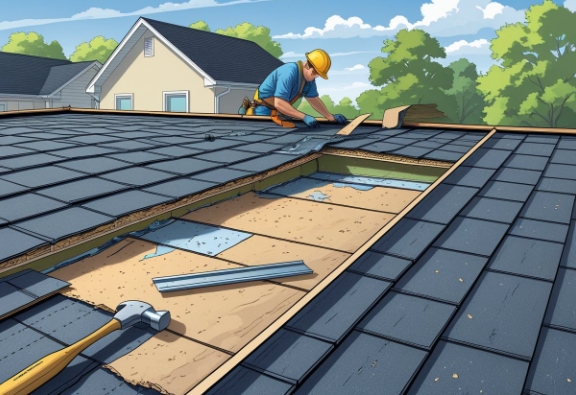
- Self adhering membranes for eaves, valleys, and details
For many homes, the highest value underlayment upgrade is not covering the entire roof with one premium material, but placing self-adhering membranes in the zones that leak most often. These peel-and-stick membranes can seal around nail penetrations and provide a more watertight layer at eaves, where ice dams and backed-up water can occur. They are also commonly used in valleys, around chimneys, skylights, and roof-to-wall transitions where water volume and complexity increase. Because they bond to the deck, they reduce the chance of wind lifting the underlayment edge and driving water beneath it. When installed correctly, they can create a continuous protective band that supports the flashing system rather than competing with it. The upgrade decision should consider roof slope and local weather patterns. Lower-slope areas generally benefit more from self-adhering protection because water moves more slowly and can linger at overlaps. A thoughtful approach is to combine a high-quality synthetic field underlayment with self-adhering membranes in critical zones, creating layered protection without making the roof assembly overly complicated.
See also: How do HVAC Contractor Solutions work for Homes With Solar Panels?
Practical next steps for upgrades
Underlayment upgrades improve long-term leak resistance by targeting how water actually challenges a roof over time. Stronger synthetic sheets can stay flat, resist tearing, and maintain dependable overlaps, while seam taping can reduce lateral water movement during wind-driven rain. Self-adhering membranes add another layer of protection at eaves, valleys, and complex details where backed-up water and heavy flow are most likely to occur. Installation upgrades such as cap fasteners, correct shingle-style layering, careful valley work, and clean flashing integration help these materials perform as intended year after year. If you are planning a reroof, ask about underlayment zones, seam handling, and how the crew protects vulnerable transitions during installation. A roof system that treats the underlayment as a serious water-management layer can reduce the risk that small weather events lead to long, expensive leak stories later.